Staging an Interior Design Photo Shoot: Why & How
posted September 20th, 2019 in Blog
by Sarah Gosson
Share
‘A Picture Paints a Thousand Words’
Looking at the methods with which consumers can rapidly search, rate, and review goods, services and businesses through social media platforms, it is apparent how much weight the online presence of a business carries. For architecture and design, it is important to keep visual presence up-to-date and to exhibit breadth of work. For E4H specifically, showing brand identity, who we are, and what we are passionate about is extremely important.
When planning a photo shoot for E4H projects we focus on the question, “What is the story we are trying to tell?”. This helps as we brainstorm what shots to take and how those shots need to be staged.
Creating the Shot List
Creating a shot list is incredibly important and can be daunting at times. After working on a project for months or years, it can be hard to narrow down which views will convey the project most effectively. Reminding yourself of the story you want to tell is an effective way to focus your efforts.
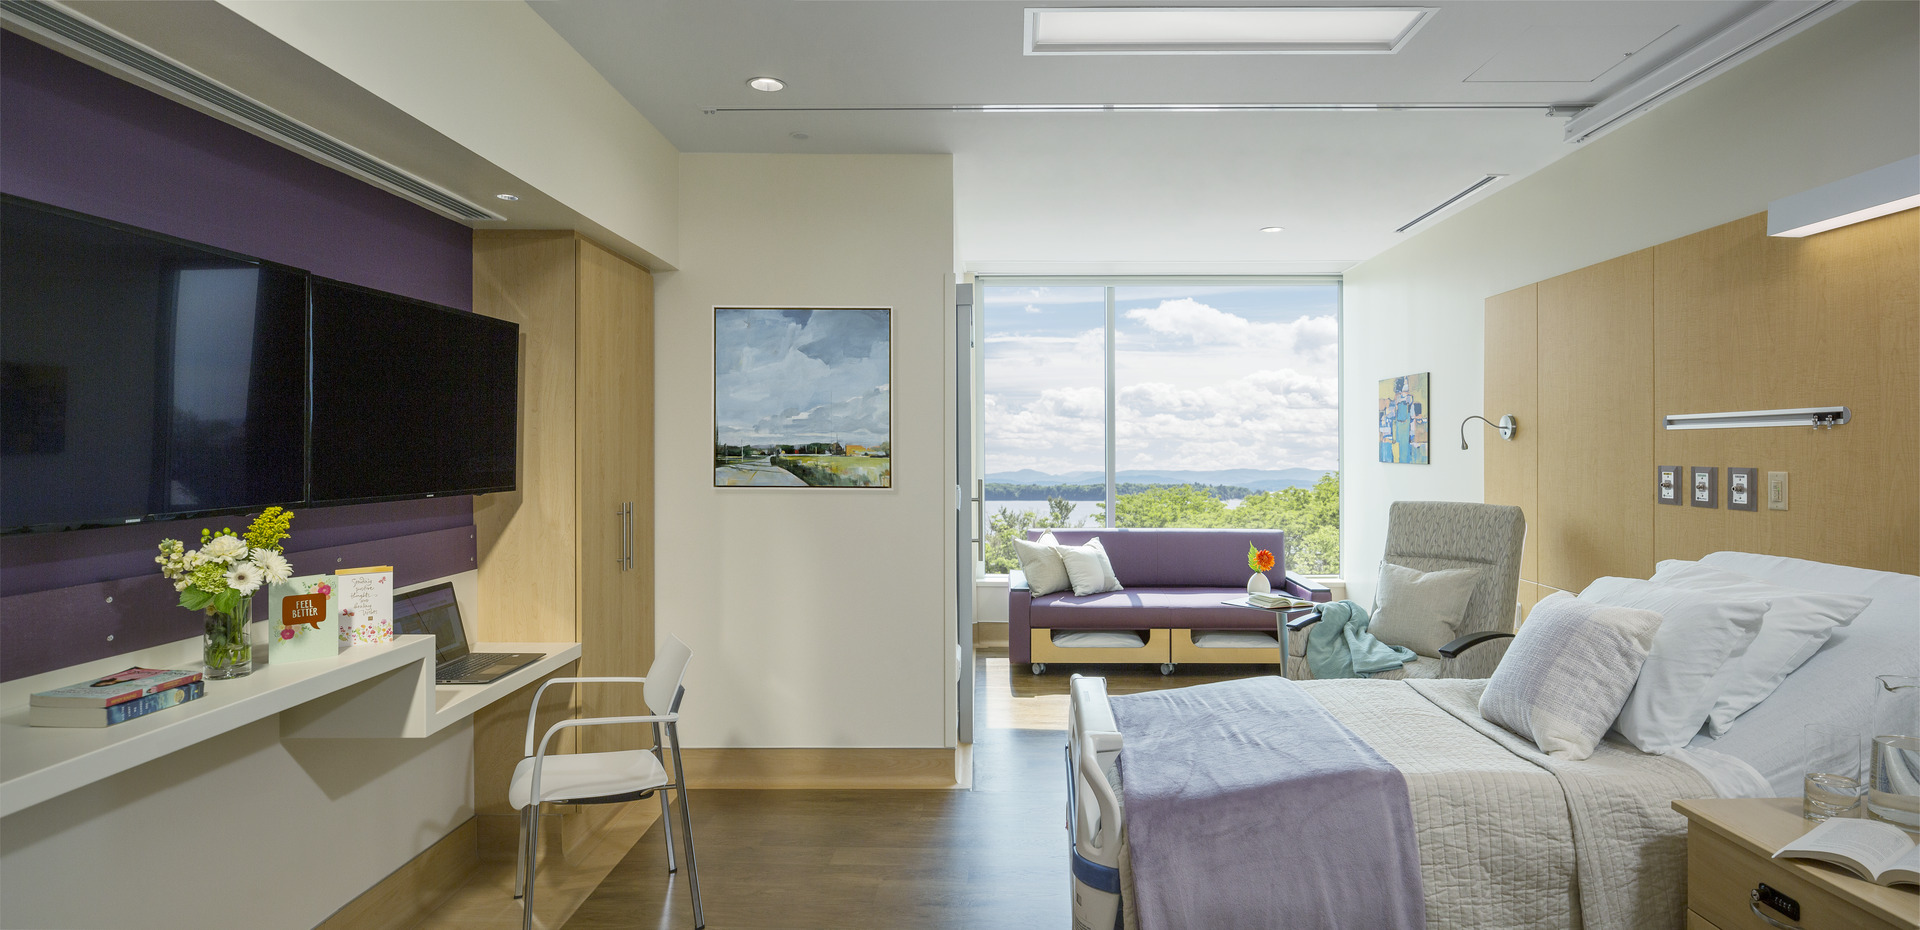
Walk the space – preferably when the project is near completion – and take photos of all the areas of importance for the project. The important thing to think about is ‘how did the design of this particular space or element come to be?’ In healthcare, the answer to this could be improvement of healing, comfort, or quality of care.
Once initial photos of the project are collected, review them as a team. These photos are called ‘scouting images’ and really help acquaint a professional photographer with the project. In some cases, the photographer may not have the luxury of walking the space until the day of the shoot, in which case these scouting images are crucial. It is imperative to maximize the window of time that is dedicated to photography.
Staging the Shot
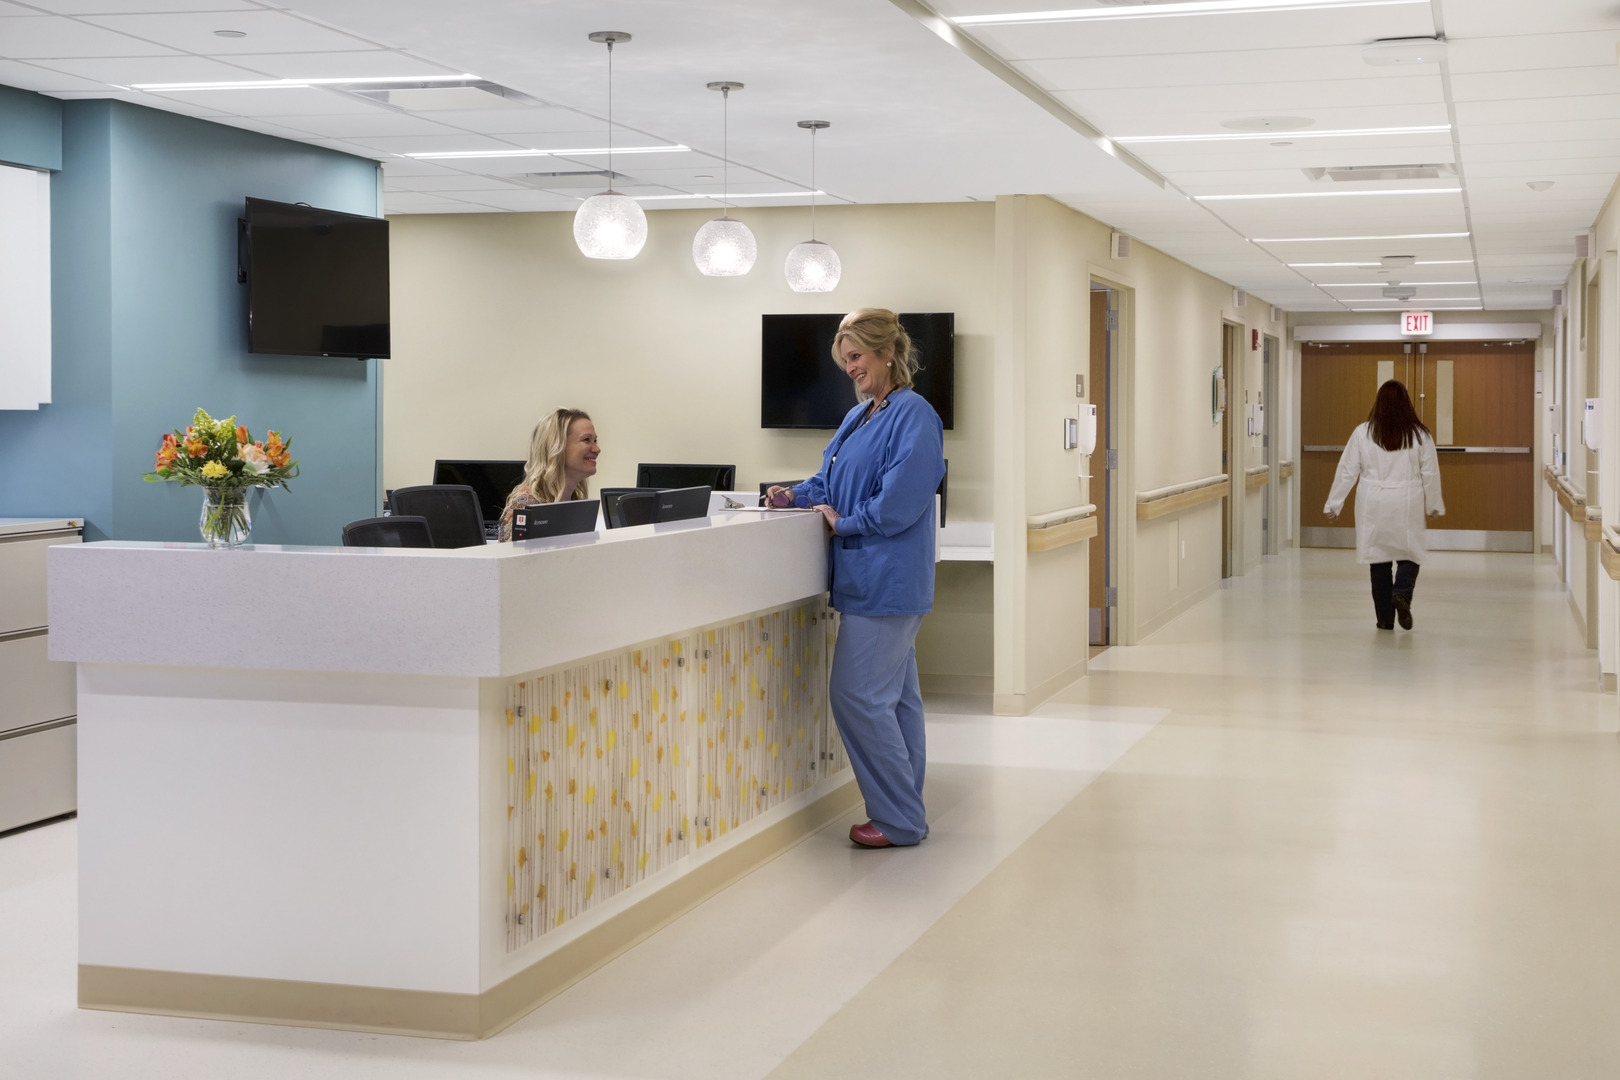
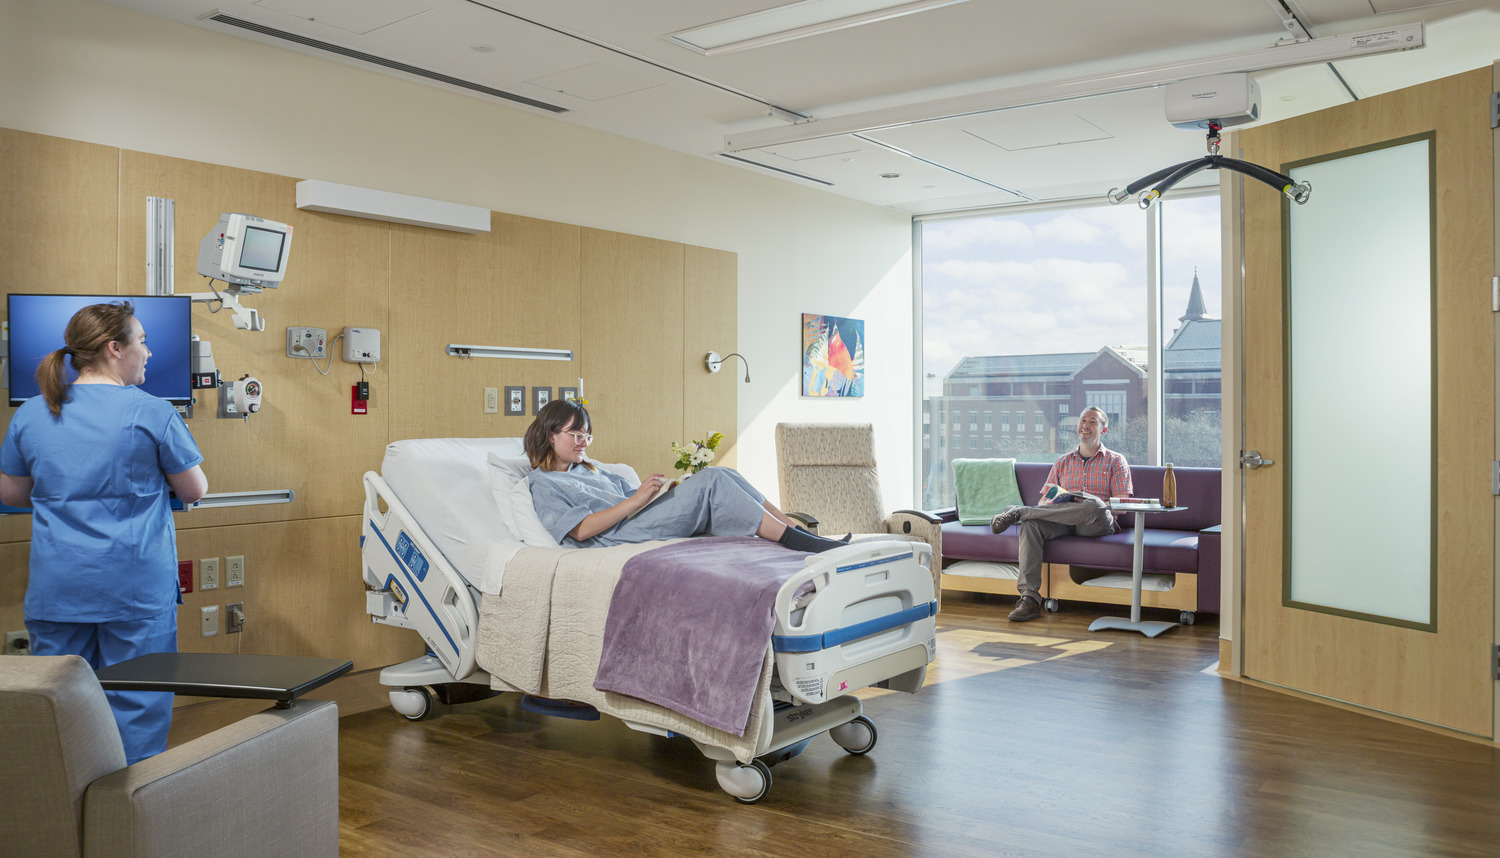
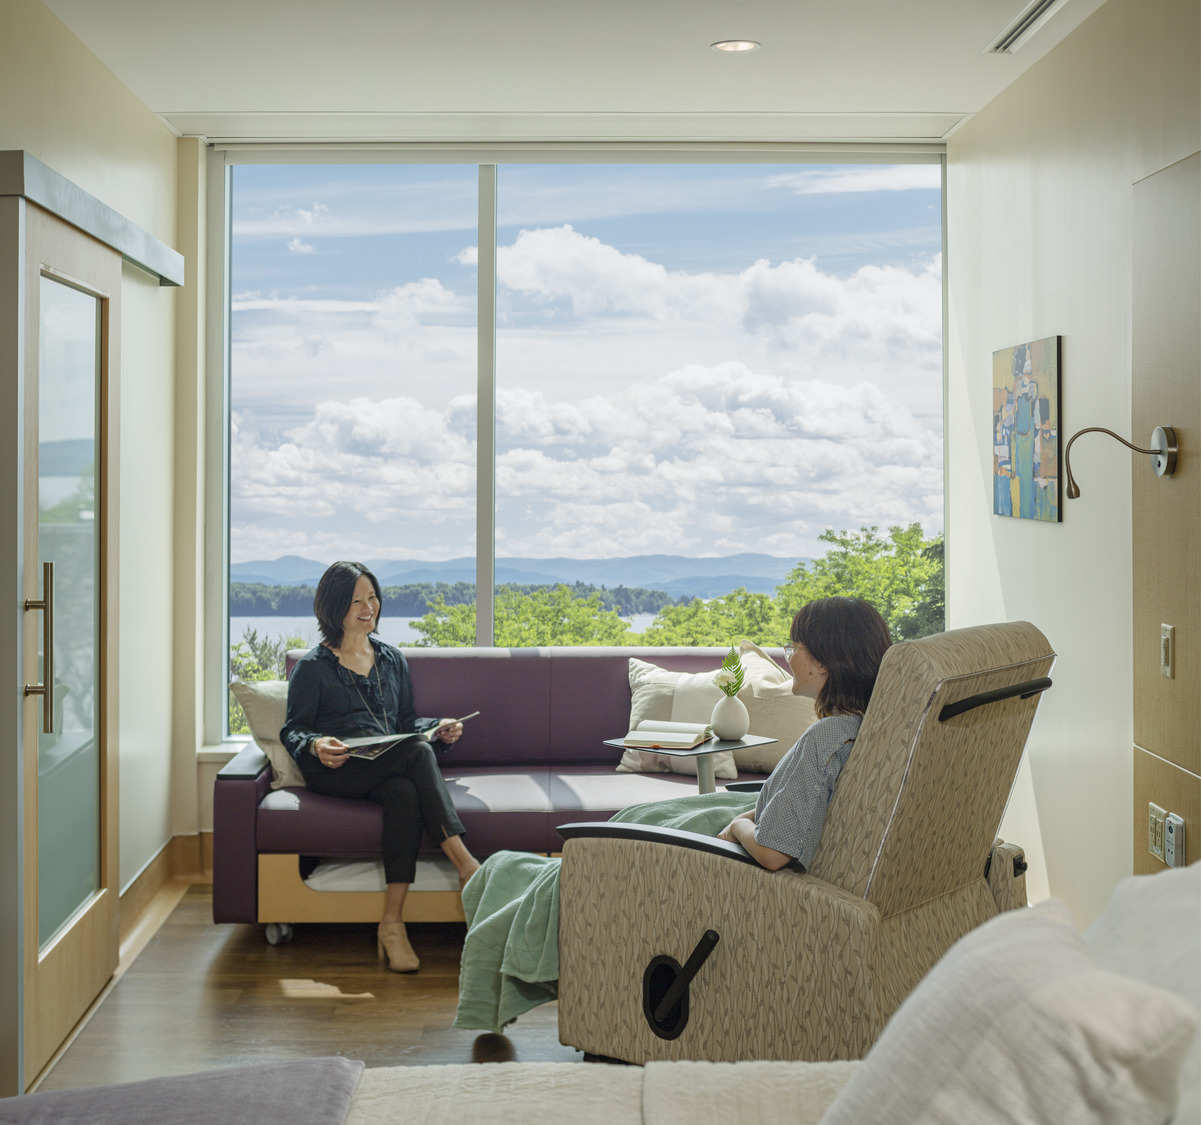
Before the photoshoot, think about the space and how it may be ‘lived in.’ Relying on team knowledge from user group meetings is one way to imagine how the space will be used. Practicality and personal experience often come into play during this stage.
It’s good practice to take photos directly after completion of construction and before the space is occupied. Visualizing the space upon completion allows you to formulate a wish-list of props needed to enhance the scene and better tell the story. Once you do this, you will need to assemble a variety of items on-hand.
Below is a list of what is typically needed to stage and prepare for a healthcare interior design photoshoot:
Props
- vases, simple, varying sizes
- fresh flowers, contrasting colors to interior finish palette
- books and magazines, think about the colors of the spines
- ‘get-well cards’, simple
- throw blanket, one that complements the interior finish palette
- extra pillows both bed and decorator
- laptop(s) or similar
- clip board(s)
- white coat(s)
- scrubs
- children’s toys if a pediatric space
- tissue box
Cleaners (Recommended):
- dustpan
- sponge
- chamois cloth
- tape (clear)
- steamer
- scissors
- glass cleaner
For the designer:
- a change of shoes
- a change of shirts (preferably solids)
- shot list/scouting images
- water
This list is just an example of items to bring to a photoshoot. These items help tell the story of the space but is not exhaustive. More props can be incorporated into the shoot depending on the function of the design.
Props. Of the items above, I might use a book, blanket, vase, fresh flowers, and a get-well card in a patient room to help convey the story of comfort and healing. This story could be supplemented with models who may be positioned to help tell the story. It is good to capture the shot both with and without the models. This allows for more flexibility in post-editing and in image selection. While staging each shot, keep looking at the image the camera is capturing to be sure that furniture is in the right place, that no wrinkles need to be steamed out, and that the placement of items in the room is balanced.
Cleaners. It is not always safe to assume that the newly constructed space will be impeccably clean. You may have pesky fingerprints on glass, a dust bunny or two in the corner, or a wrinkly set of linens on the patient bed. Cleaning up these blemishes before taking the photo is a tremendous help to the photographer and will ultimately yield better photos. Tape and scissors are not necessarily for cleaning in the traditional sense, but can help hold items in place to preserve visual balance in the photo – is that flower sitting just a little too high? Is that artwork a little crooked? Bringing useful items and tools will assist in making the photo shoot go smoother.
For the designer. When I’m staging a photo shoot, I typically have many more props on my person. However, these are things that may not be in the ‘every day’ bag. For photoshoots, I try to wear black sneakers and a dark non-neutral color blouse with black pants. However, sometimes you have to step into the shot to add scale to a space. For example, if a white shirt is photographed with a white wall behind, it wouldn’t provide contrast in the space and it would make it very difficult for post-editing. Bringing a wardrobe change can help provide options and variety for these situations.
Results
Before the images are ready to share on our website, social media, or anywhere else, the photographer will make additional edits to the images. Be sure to account for this in your schedule – it is important that all the blemishes and distractions be removed. In this editing round, I like to take notes for the next time – are there things that we could have caught and fixed while the photo was being taken? If so, I put it on the list for next time. The more that is planned for and fixed during the shoot, the smoother the post-edit process is.
Once the images are edited, they are ready for publication!
About Sarah Gosson
IIDA